
The blowpipe and lamp are a cheap and easy way to achieve high temperatures capable of melting tiny quantities of metal, fusing minerals, or soldering small jewelry pieces. The flame is clean, which means it adds no contaminants to the metal in it, and can be either oxidizing or reducing, depending on positioning of the work in the flame and how hard it is blown.
Standard disclaimer: This project and others available on this site uses heat, tools, chemicals, and open flames. You are responsible for taking all applicable safety precautions, and applying common sense. Since I have no control over how you do things in your own shop, or what precautions you choose to use or not use, and I'm not there to hold your hand, it's not my fault if you hurt yourself.
Canning jars can be bought in supermarkets, in cases of a dozen, or at art supplies as singles. They're not expensive. Any screw top jar with a metal lid would have worked for this. I like my design because it doesn't have anything but glass and metal in contact with the alcohol, but it doesn't make a huge difference.
The copper metal would have been expensive if I didn't have it laying around. It doesn't have to be copper though. Any piece of sheet metal would have worked here. You could literally use the side of a tin can.
The wick pipe was a scrap of brass tube. A metal pen barrel would work. For that matter, you could just lead the wick through a hole in the sheet. Nothing fancy needed here.
The wire clip was from an electrical jumper wire. You can find them at hardware stores, electrical supplies, or head shops, where they'll probably be called 'roach clips'.
The aquarium hose was from a pet shop, but I didn't buy it for this. It was a scrap left over from setting up an aquarium pump. Even if I had bought it new, a piece of this doesn't cost a lot.
The ball inflation needle came free in a set with a ball pump I used for something else. If you'd prefer to use a hypodermic, they can be had at a druggists in most places in the world, or in the US where we're weird about such things upon you can still get them at farm supplies. The insulin syringe in some pics was bought over the counter at a druggists, and the syringe and needle visible in some shots was from 'farm and fleet' in the vet section. I didn't buy either one for this. They're leftovers from the farm. The insulin needle turned out to be WAY too small for enough air to flow through, and I didn't bother taking a pic of it in use. The ball needle was just a bit too big, putting too much air into the flame and making it ragged. The 22 gauge hypodermic was just right.
The lamp wick was from a small lantern. It came as a spare. This one is slightly oval. I would have preferred a round wick. You could braid cotton string together and make a wick if you wanted.
To make this project accessible, I did it with a very minimal toolset. I didn't even use all the tools that were visible on the bench. The minimum tool set for this is a pair of scissors, a knife, and a pair of pliers. A file or some sandpaper would help, but isn't horribly necessary. As a bootstrap technology project, no soldering is required. You COULD solder the wick pipe and clip in place, but it isn't at all needed.
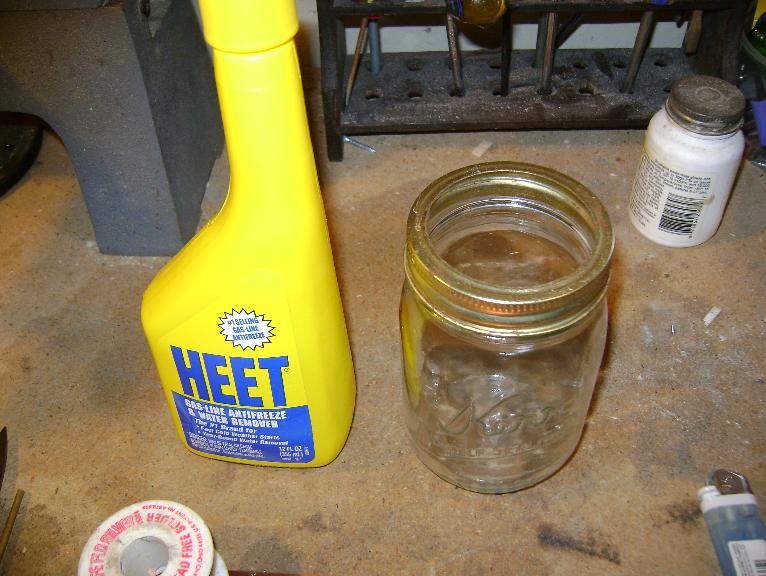
The jar and the fuel. This is a gas line antifreeze that just happens to be the cheapest way to buy a small amount of methyl alcohol or 'meths'. It's only sold during the winter months though. I had this one left over. Rubbing alcohol in the higher strengths or denatured alcohol would both work. Any alcohol that says it would work in camp stoves or chafing dishes would work.
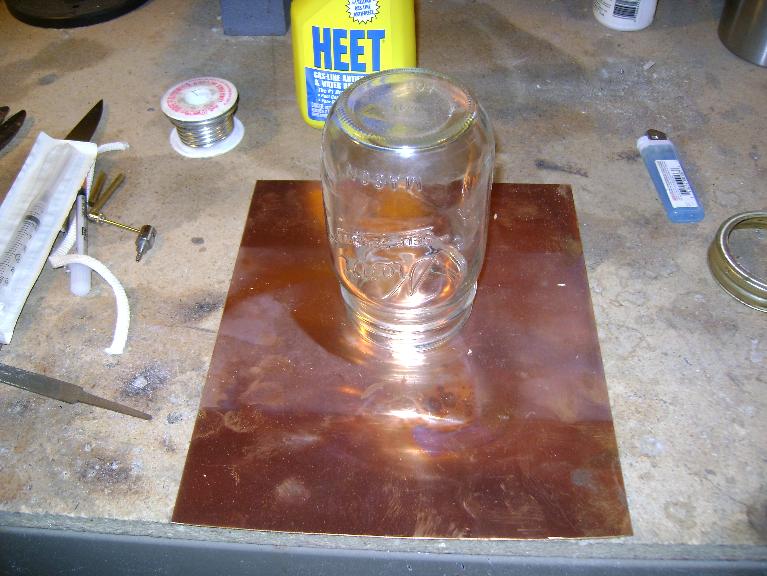
I set the jar mouth down on the metal sheet, and traced around it with a knife to leave a scribe line. Don't do what I ALMOST did here while being absent minded and fiddling with the camera. This would have wasted an awful lot of metal
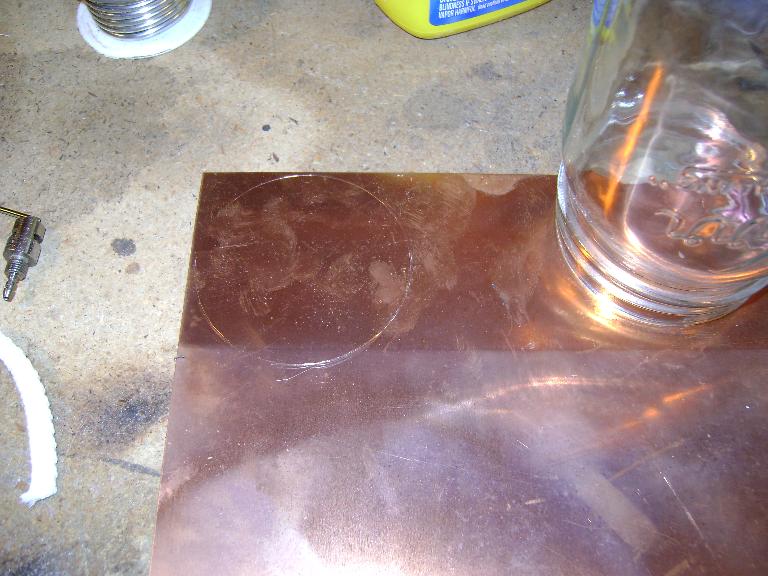
Here's where you want to put your cut. Right in the corner. Leaves most of the sheet for later projects. I guess it wouldn't really matter much if it was tin can metal, but the principle of the thing...
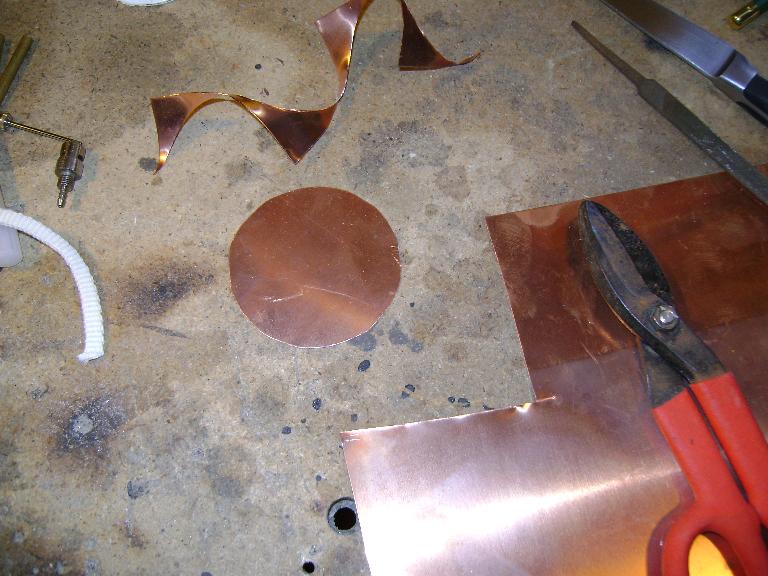
Here's the disk cut out. I used tin snips, but heavy scissors would work as well. This is REALLY thin metal.
Once I had the disk cut out, I put it in place on the jar and screwed the ring down. This is so I can mark off the part that is covered by the ring. I want to make sure that the holes I'm going to make don't interfere with putting the lid back on.
Here it is with a clearance line scribed.

Once I knew where I could make holes on the plate, I marked one near the center and one near the edge. The one at the edge will be for the wick, and the one near the center for the clip to hold the blowpipe. I put the wick at the edge so that the flame blows over the edge of the lamp, which makes it a lot easier to get the flame and the work together. The marks are hard to see; I just scratched them with the point of the knife.
I made the holes without a drill, by pressing the point of the knife into the copper and rotating it. It isn't the fastest way to make a hole, but I didn't feel like I should start a bootstrap project with a big list of tools to buy. Bootstrap projects are for people who don't have tools, and don't have a lot of knowlege YET.
Here's the finished hole. It took a while. I could have done it in a moment or two with a drill, but that defeats the purpose, and also by doing it this way I can try the wick pipe as I go to make it a very close fit. It should just press in.
Here's the wick pipe in place. It's a pretty tight fit, but it'll still move a bit and work lose unless you solder it or find some other way to hold it in place.
I promised a project that didn't need soldering, so here's how the pipe is held in place. I took the pliers and crimped it oval above and below the plate, so there's no way it can come out. This is a good thing too, as the wick is a bit oval, and this makes it a bit freer running in the pipe.
I made another hole in the approximate center of the plate, this one to be a tight fit for the bottom end of the clip. I put the clip in place, and then crimped it a bit oval too so it couldn't come out. It's helpful to still be able to rotate it, so I didn't crimp it that hard. Here it is in place, with the ball needle in it so I could line it up.
I had to do a bit of prep on the ball needle. It has holes on the side as well as the end. I want all the air to go forward into the flame. I put it on the bench and rolled it back and forth while bearing down a bit with the knife, to change it from this...
To this!
Here's the whole thing together. To pull the wick through, I taped the end and left a tail of rolled up tape. Forgot to take a pic of that step... After I had it pulled through, I cut the end square across with the knife. The aquarium tubing is a jam fit in the hub of the needle, and I taped it in place.
Here's the other blowpipe, with a smaller needle. The tube wouldn't fit inside this one, so I carved the hub down until the tube could stretch over it instead. I used a file to take the bevel off the sharp end, so the air would come out square.
Here it is in operation. It wasn't easy to get a pic that shows the flame, but you can see that it is long and pointed. It's actually a lot more visible in person, and very hot, as its getting a lot more air to burn than it would normally have. The insulin syringe actually ended up having a use, although too narrow to blow enough air through. It turned out to be the only thing I had (without resorting to other tools) that was small enough to deburr the inside of the larger needle, and until the 22 gauge needle was deburred, the airflow was really rough and didn't give nearly as nice a pointy flame.
So, did it work? Yes, in a general sense. I was hoping for something with a bit more output, and this isn't it. It isn't going to replace any of my torches, but it has a definite nitch. I was able to solder silver jump rings with hard solder, and soft soldering was a breeze. It was underpowered for hard soldering heavy ring shanks. This would be just the thing for soft soldering on small to medium pieces, or putting together fine chain or small jewelry.
Find more Tinker Projects: