
The rivet is one of the oldest methods of fastening two pieces of metal together. Rivets are used for everything from steam boilers to armour plate. Rivets can be anything from something made of fine gold wire holding jewelry together, to something thicker than your leg, fastening iron-plate beams in the foundation of a skyscraper. Riveting is an all-around useful skill to have. This project documents the making and setting of a rivet to repair a broken joint in one of a pair of legs from Lady Mira's suit of plate.
Standard disclaimer: This project and others available on this site uses heat, tools, chemicals, and open flames. You are responsible for taking all applicable safety precautions, and applying common sense. Since I have no control over how you do things in your own shop, or what precautions you choose to use or not use, and I'm not there to hold your hand, it's not my fault if you hurt yourself.
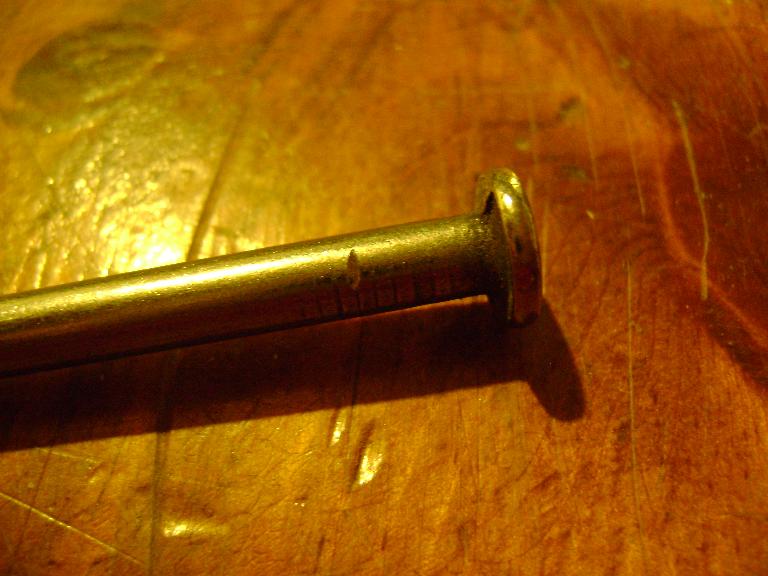
I bought the nails at a local chain hardware store. They're a store brand, and cost a couple of dollars or so for a five pound box. I didn't specifically buy them for this project: I do a lot of armouring work for my shire, and I keep materials like rivet stock and plate on hand.
This is a medieval level of technology here. You'll need something to bash with, something heavy to rest what you're bashing on, something to cut the rivet to length with, and something to smooth down the inevitable rough edges. I used a ball peen hammer, a 55 pound cast steel anvil, a pair of bolt clippers, and a file. To be fair, I actually used TWO files, as I used a tiny one to mark the length of the rivet so I'd know right where to cut it. Other options for tools: You can use just about any sort of hammer, as long as it is heavy enough to mash the rivet metal. You could use a rock on a stick, but it'd most likely give a rough finish. For an anvil, just about any heavy lump of metal will do. I've laid things on rocks, on the ball from a trailer hitch, on the back of a metal bench vise, etc. It's just something heavy to rest the other end of the rivet on so that hammering on it changes its shape instead of just moving it around.
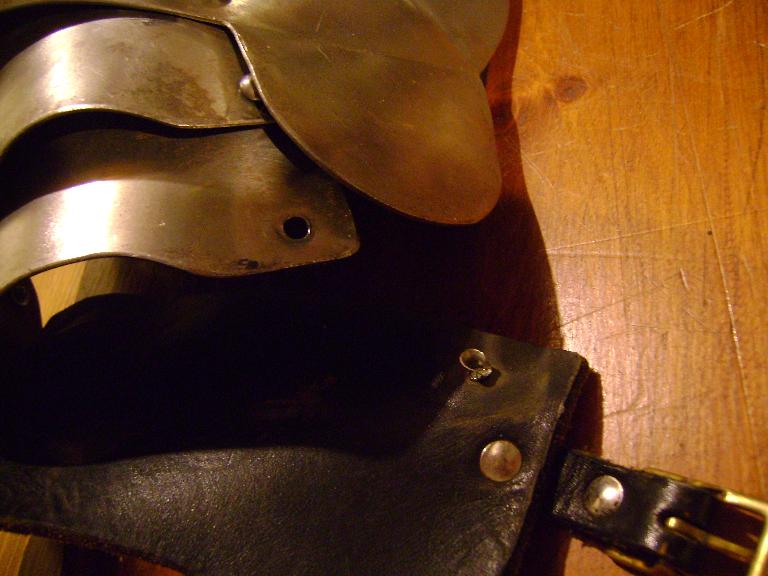
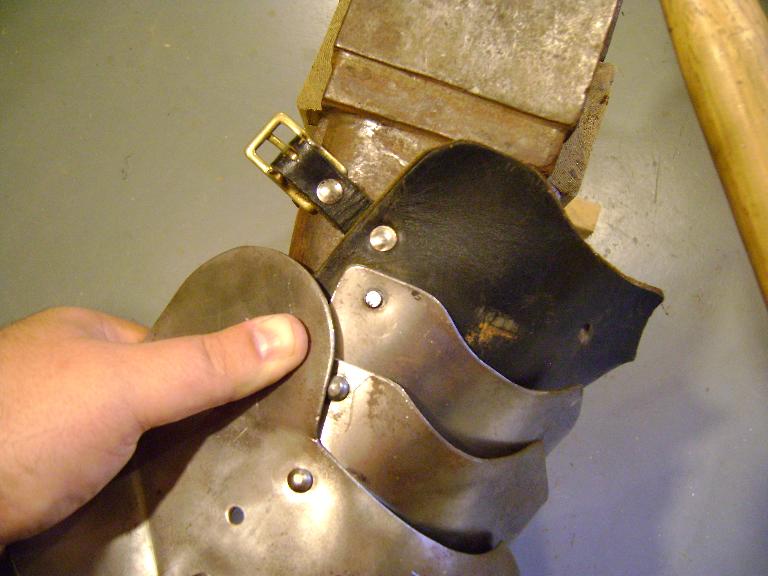
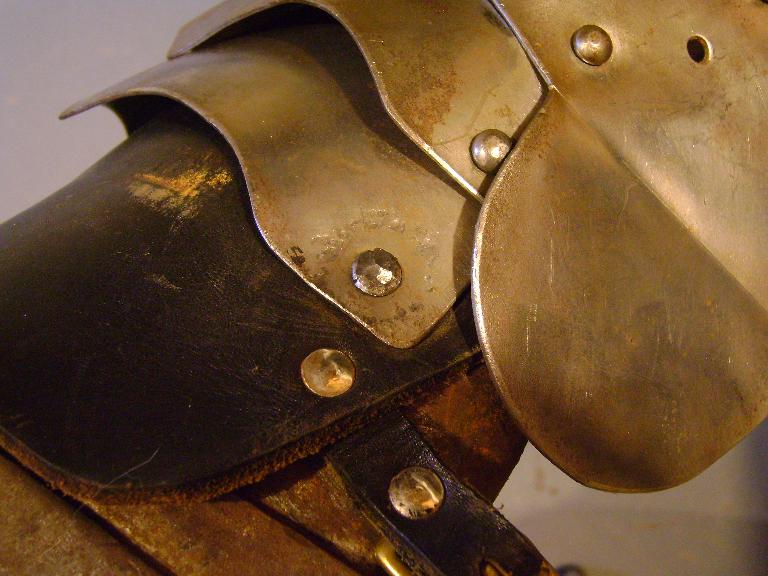
Lady Mira's legs are commercially made, by Ashcraft-Baker armourers, a manufacture of 'munition grade' armour, which basically means 'not bespoke, and you'll want to polish it yourself if you want it shiny'. They did a great job with the main rivets in the articulation, but the strapping and fitting job was farmed out, and the straps, leather thighs and shins are connected to the knee with tubular press together rivets. As you can see here, it just pulled through, mangling itself in the process. This has happened several times in the past, and each time it does I put in a new rivet, of the much stronger solid steel variety. Before the rivets break and come loose it's actually not that easy to get them out, so it's been easier to just wait for each one to break and replace them piecemeal than to pull them all and redo from scratch. I think we're down to two more, all on this leg. The other leg is completely redone, and I haven't had to screw around with it since.
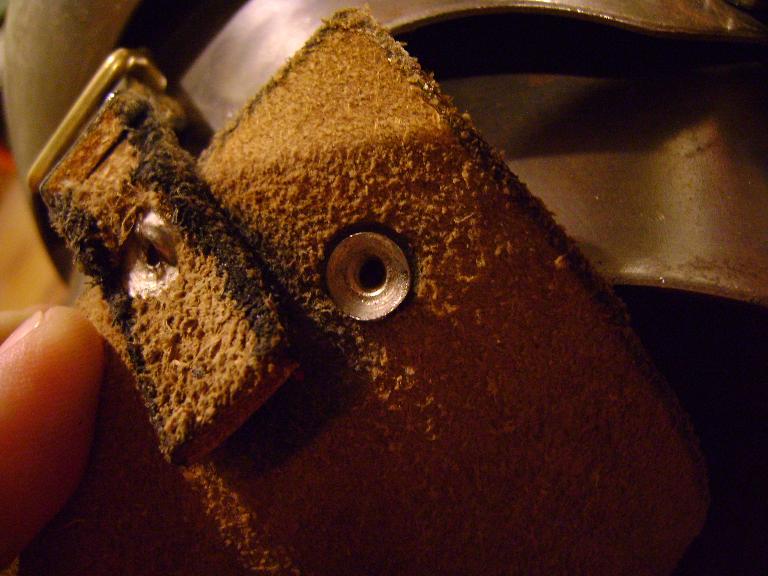
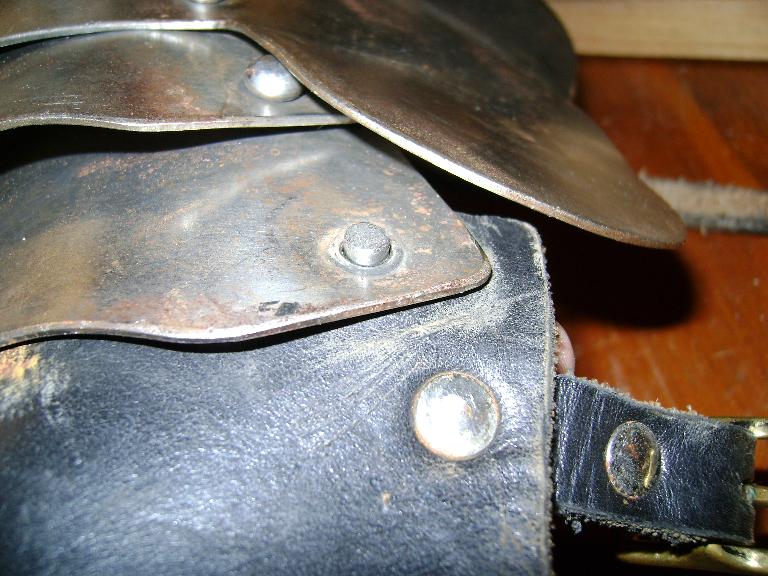
Here you can see why this rivet failed. They're stainless steel tubes, of very thin metal. The end that goes on the side that shows is made just like this one, except that it has a decorative cap crimped over it, so you can't see that they're hollow. These come in two parts, one with a tube slightly narrower than the other, so that it press fits inside, and is held there by friction. They're fast, easy, cheap, and look good for a while, but when it comes to strength they're a joke. You can see the one at the end of the strap is starting to fail. It'll likely be the next one that I fix. Luckily, that one is on a low stress location. Finding these on armour is equivalent to finding that the used car you're thinking about buying is all body putty under the paint. It means someone took shortcuts on quality, and sooner or later you'll be fixing it again. Luckily I know how.
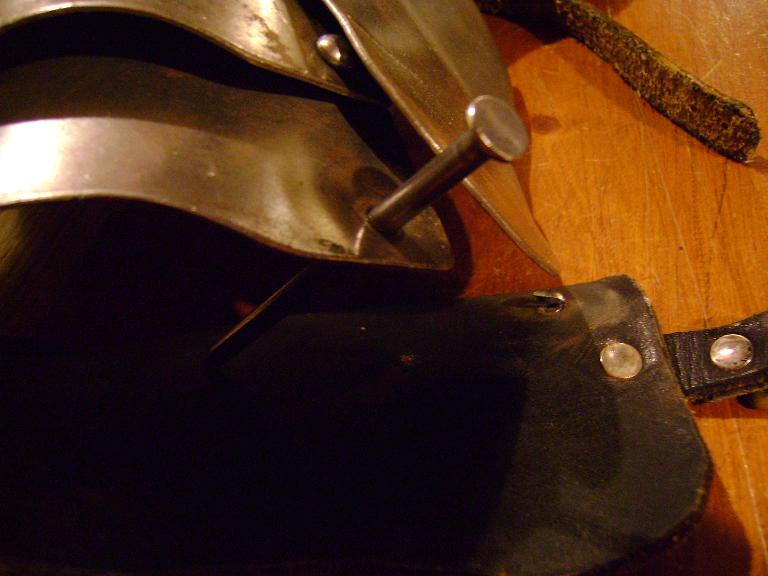
I pulled the old rivet out. I used the bolt cutters and just nipped it off and pulled it through. Once I had the hole empty, I could test several different nails to see which one was the best fit. I just grabbed a handful from the carton.

Here's one that's a pretty good fit. Nice and snug. You don't want it loose in the hole. It'll be hard to make it expand enough to tighten up and hold the material well.
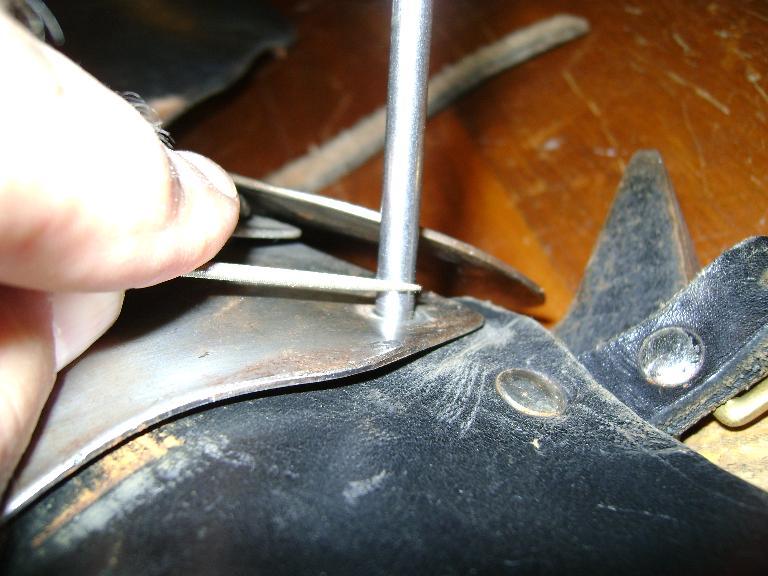
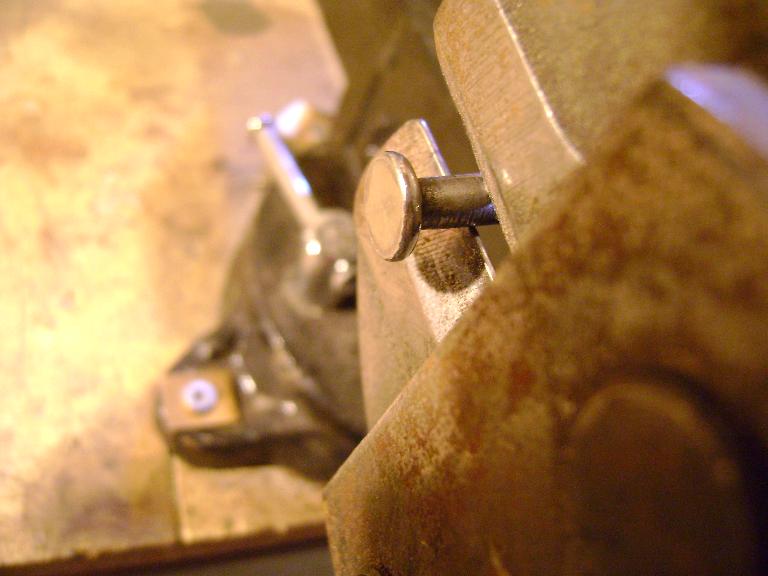
To figure out how long the rivet has to be, I could measure the thickness of both layers I plan to fasten, and add what I need to form the head, then measure and mark the rivet, or I can just put it in place and mark it. Guess which one's easier. I put it in place, then made a mark for the extra length to form the head. I like to use a length equal to the rivet diameter for the head. Here I'm just eyeballing that, but I could also lay another nail crosswise to this one, and mark its thickness on the nail I'm turning into a rivet.
Here's the mark. If I do these freehand I always end up making them too long. I visualize them as needing to be longer, then I have to cut them again. Now, if I was doing lots of riveting of the same material, I could just cut them ALL to this length and save time.
I clamped the rivet, and used the bolt cutters to clip it to length.
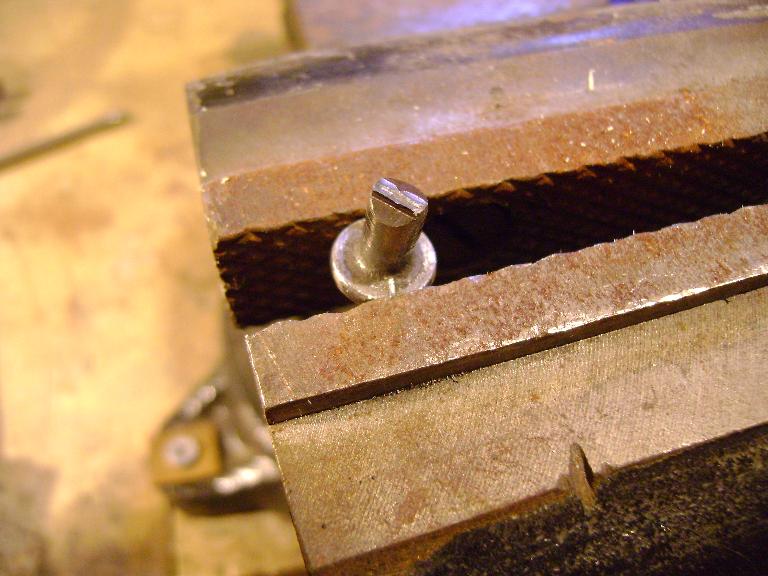
Bolt cutters cut with relatively blunt edges, so the edges can be very hard and strong. If the edges were razor sharp, they wouldn't be thick enough to stand up against the pressure of the cut, and they'd chip or bend. The downside of this is that they make a cut that's got a mashed, crimped end. For rough work, this doesn't matter much, but it tends to make for an asymmetrical rivet head. Here's a picture of the rivet before filing...
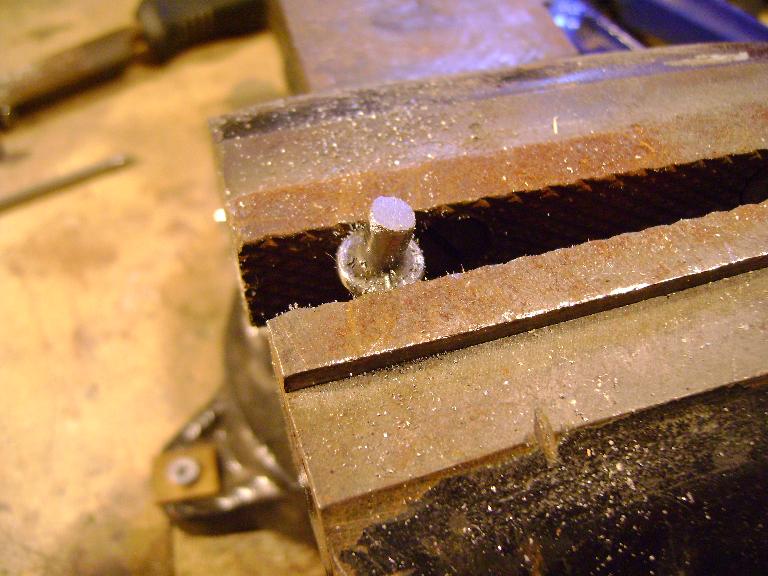
And after. A few strokes with a coarse file, and the rough ridge of crushed metal is gone. I took a few file strokes around the outside edge too, to take the burr off, so it would go into its hole easily.
One I have it nice and smooth, it's time to put it in its hole. I used a tapered awl to stretch the leather a bit, as it was a tight fit on the rivet. Much better to stretch it a bit, put the rivet in place, then let the stretch relax, than to cut the hole larger and lose strength.
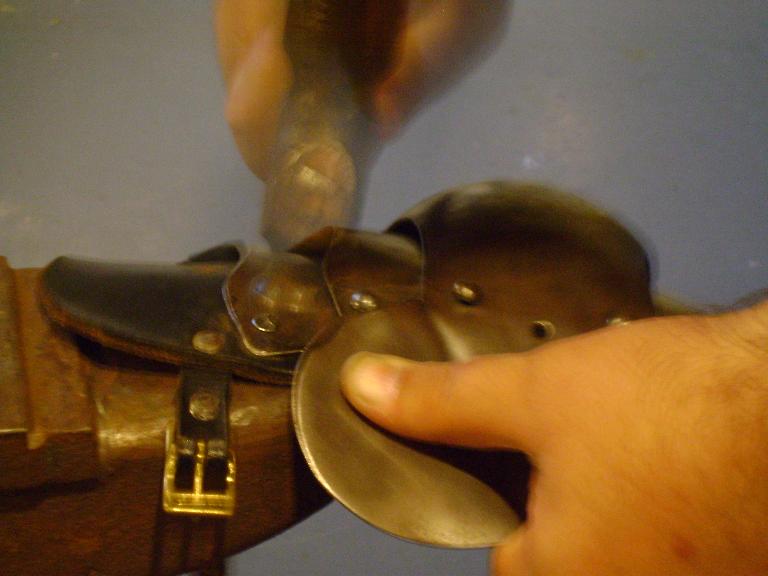
When I hit the rivet with a hammer, I need something solid and heavy behind it so it doesn't just go shooting back out of the hole, and so the blows I aim at it change its shape instead of moving it. Since this is in a curved plate, it needs to sit on a curved surface. Ideally, you hold it so that the rivet is flat against the anvil and nothing else is touching. Here I'm using the horn, so that the curved plate won't rest on the anvil.
I didn't have an extra hand to take a shot, but Lady Mira was in the shop, watching me repair her legs, so she was able to get a picture. It's blurry because everything is moving, with nice sharp edges in the blur when the flash went off.
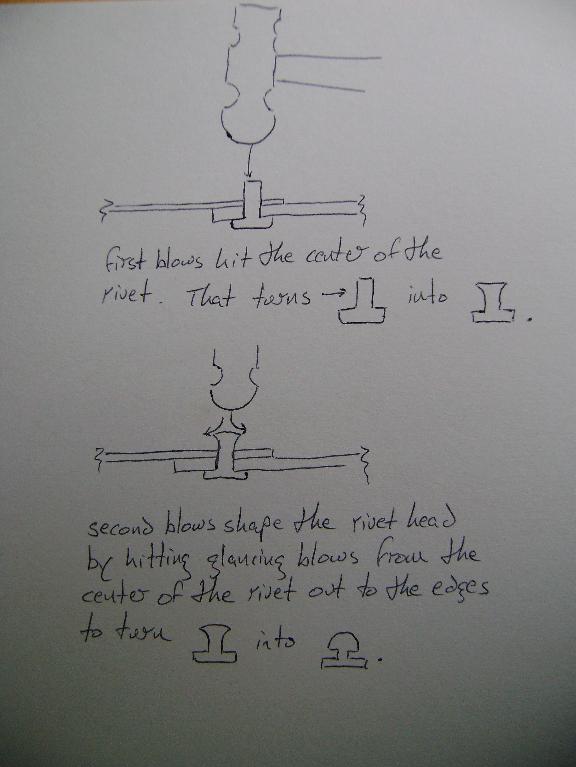
Here's a clearer idea of what's going on. Since there's no good way to take pictures that show this, I drew it instead. The first step is to hit the rivet some hard blows close to the center with the ball of the hammer. This flares it out quickly. Then I begin hitting it glancing blows in a circle around the center, which continues to flare it out but also begins to bend the edges down towards the plate. I finish up with heavy blows around the outside edge. I try to keep the blows evenly spaced so that the rivet isn't lopsided and has a pleasant, domed surface with evenly spaced facets. If I wanted a smooth domed head, I'd need to use a rivet set, which is a punch with a hollowed end. The hollow is the same shape you want the rivet head to be. It's essentially a molding process. The rivets set by the team at Ashcraft-Baker Armoury used a rivet set with a domed shape, to form the nice, smooth, domed rivets on the articulations. Mine isn't a perfect match for that, but it's still functional and non-ugly.
here's the finished product. It's approximately the size of the rest of the rivets on the piece, though the hammertoned texture isn't a perfect match. The glancing blows do leave scuff marks on the plate, which I'd polish off with a wire wheel if this was a shiny piece. As it is, it's munition grade armour, and it's not a display piece. Lady Mira uses her stuff hard, and it won't be long before this has a nice patina to match the rest.
This is a useful skill. It's a strong, permanent way to assemble durable items. It takes some practice, but the best way to get that practice is to do it. The first ones you do will be ugly. As long as they're strong enough to do what they need to do, ugly is OK, but we strive for not-ugly. This one would have been a bit prettier if I'd annealed the rivet before hammering on it. By heating it to a dull red and letting it cool slowly, the metal would have been a bit softer, and the edges of the rivet head wouldn't be as ragged. There are plenty of variations in head shape. Striking flat blows with the flat side of the hammer can make a pan headed rivet similar to the way the nail heads look. Nails and rivets on early american pieces are often finished with a decorative head called a 'five clout rose' made by striking the last five blows very hard, with one centered, and four spaced out around the perimeter. Similarly a 'four clout rose' would have four blows spaced around the perimeter, skipping the centered one, to make a shallow-sloped pyramid shape. Rivets can be decorated with punch and chisel work once they're in place. Lots of ways to make it pretty, and lots of regional variations and styles.
Find more Tinker Projects: