One of the most daunting parts of making Maille is the truly prodigous number of rings needed. Making rings by hand is time consuming and fatiguing, and has at one time or another turned most of the maillers I know away from the craft. What is needed is a fast and non-fatiguing way of turning out large quantities of rings. After trying several different methods, which all more-or-less worked, but were either too slow or not really cost effective, or both, I came up with the method described below.
Standard disclaimer: This project and others available on this site uses heat, tools, chemicals, and open flames. You are responsible for taking all applicable safety precautions, and applying common sense. Since I have no control over how you do things in your own shop, or what precautions you choose to use or not use, and I'm not there to hold your hand, it's not my fault if you hurt yourself.
These are the tools I use to make and cut wire coils. The mandrel is 1/2 inch diameter, and made of polished mild steel. The wire in these pictures is 14 ga. bright galvanized wire, bought as fence wire at a local hardware chain.
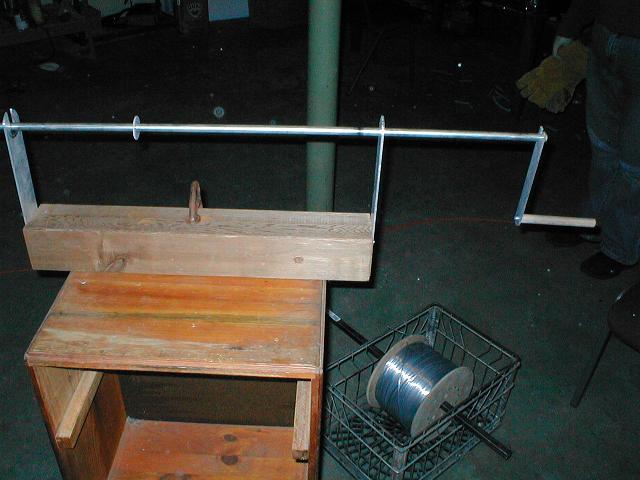
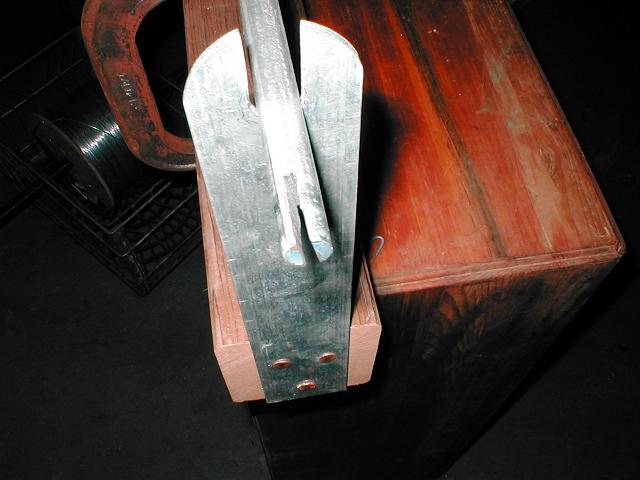
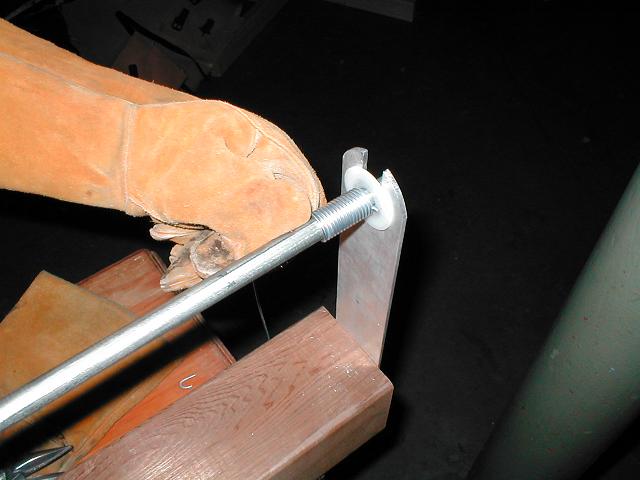
The other end of the mandrel has a simple crank fastened to it. I slotted the steel on both sides with a saw, then filed a slot in the end of a strip of aluminum such that it was a driving fit into the saw cuts. I've found no benefit to using an electric drill to turn the mandrel, as it's too hard to stop quickly when the wire inevitably kinks or doubles back on itself. The mandrel sits in a mandrel stand which guides it as it turns and makes it possible to pull on the wire while cranking. I've found that a nylon washer on the mandrel between the end of the coil and the upright on the stand helps with turning. Previously the end of the coil would catch on the slot in the upright, and the coil would tend to jump, or thread itself into the slot.
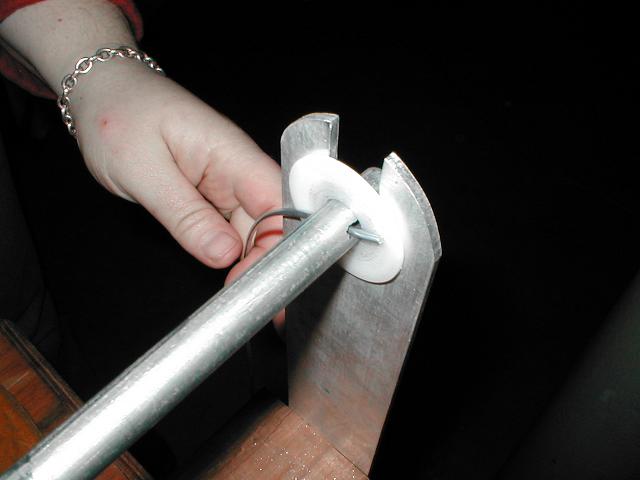
The coil is started by putting about half an inch of it into the slot and bending it over. After that, the crank is slowly turned while the wire is guided on smoothly. A pair of heavy gloves goes a long way towards preventing wire burn of the hands.
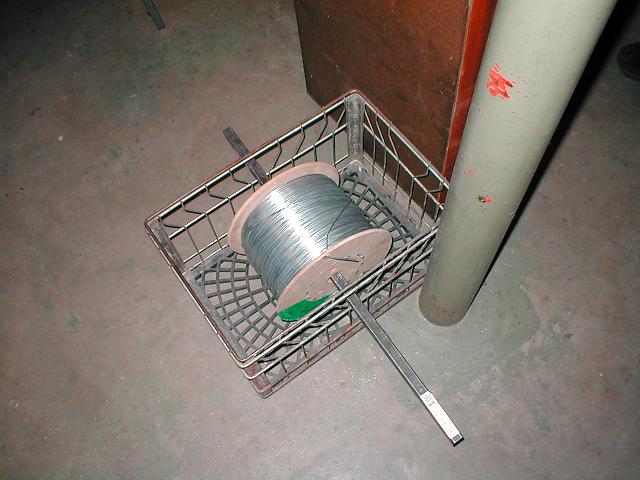
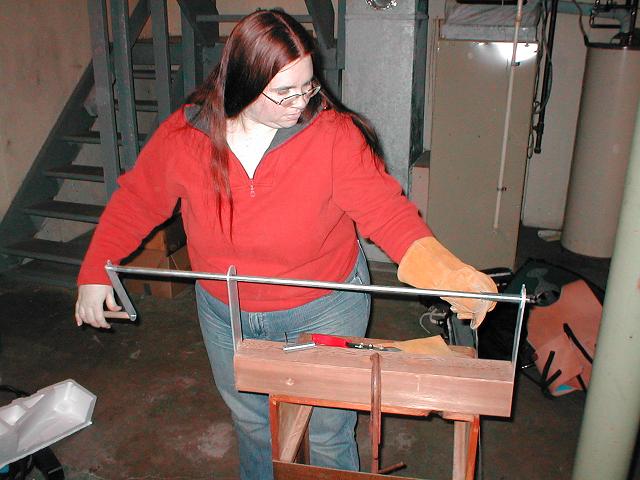
While the wire is coiling onto the mandrel, it draws from a spool in a stand on the floor. It turns out to be important to have the wire uncoil smoothly. Otherwise the coil tends to be uneven and lumpy.
One 'feature' visible here is that the mandrel is a bit longer than the stand, creating a bit of an awkward working posture. I recently shortened the stand and have yet to cut the mandrel down to match. It was originally over three feet long, and a three foot long coil was a bit too long to handle easily.
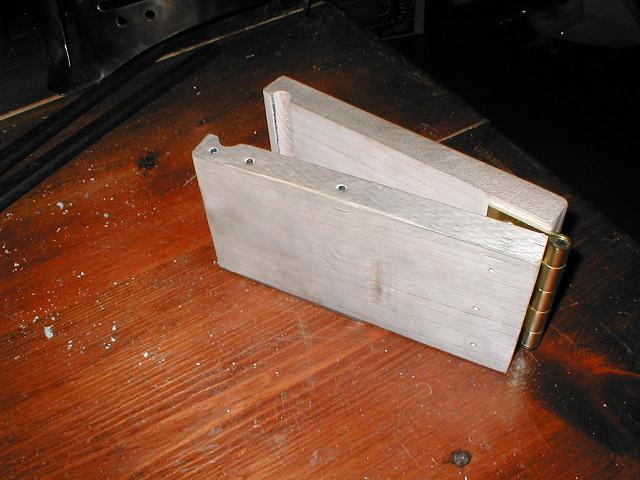
To hold the coils while they're cut I use a clamp I made from some maple 1 by 4 board, a door hinge, and a scrap of 1/16th inch armor plate.
Once the coils are made, they're cut into four inch sections to fit in the clamp.
After the coil is lined up in the clamp, the clamp is tightly closed by a 'vice-grip' welder's pliers. Oh, and I just finished polishing my newest anvil. Shiny!
To cut the coil in the clamp I use a metal-cutting blade in my bandsaw. The only modification to the saw is that there's an additional blade guide clamped in place. It stops the blade from cutting too deeply into the coil. Without it, it's easy to push too hard on the coil while cutting, and miss the subtle moment when the blade cuts through. Then the whole clamp slides forwards until the blade nicks the inside of the links as well. With this set-up the guide is ajusted so that the clamp strikes it right as the blade breaks through. No overcutting. I also experimented with a fence to help position the clamp as I slid it forward. It helped a little, but not so much that I had to set it up again for the pictures.
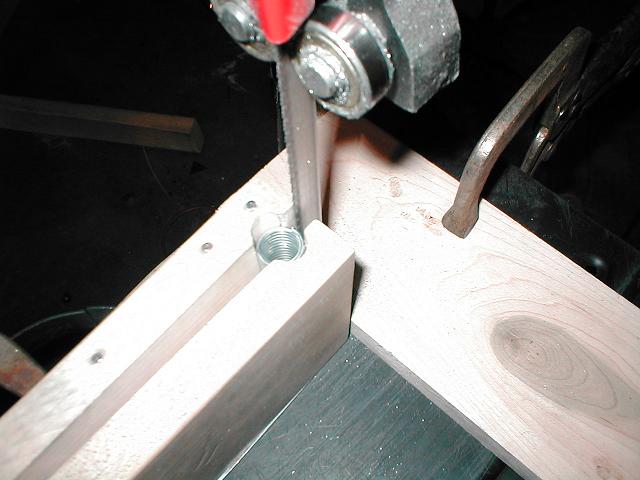
Here the clamp is in place, and the coil is being applied to the blade. It takes several seconds to cut through. The blade here is about 14 teeth to the inch. I'd originally used a much finer one, but there was no real increase in smoothness of cut, and a substantial decrease in speed. A 32 teeth to the inch blade took almost a minute to cut through.
Here's the finished product: a handful of rings. Each four inch section makes around forty rings. Total time to clamp, cut, and dump the coil is currently under a minute and dropping, and Mira can wind and prep the coils just as quickly. It takes about an hour right now to fill a gallon bucket with rings, and this is enough to knit for quite a while.
Find more Tinker Projects:
Please read our disclaimer and copyright page